Picture 1: website logos.
Introduction
I worked on building a website for “Centre Ahli”, a center that welcomes boys in precarious situations whose ages vary between 7 and 15 years.
To store information, I used a database and handled it using Microsoft SQL Server Management Studio. To program I used Visual Studio which allows using all of the technologies needed in one program.
The website is still under construction and is not available for the public right now.
Goals
- To present the center to the public in a positive way.
- To be international by using English, Arabic and French as the supported languages since a lot of the volunteers that come to the center to help are non-Moroccans.
To automate some tasks that are performed daily by the educators, such as:
- Organizing activities with the children.
- Adding children to those activities.
- Subscribing volunteers to those activities.
Technology used
Client side:
- HTML
- CSS
- JavaScript
Server side:
- C#
- ASP.NET
- Microsoft SQL Server
Software:
- Visual Studio
- Microsoft SQL Server Management Studio
- FileZilla
Front Page
The first things visitors see are some menus, a brief description of the center, a link to a more descriptive page if they wish to learn more about the center and some logos / graphics.
The language menu allows switching the website between different languages: English, French or Arabic.
The search / social media menu allows looking for information in the website or to get to the center's social media pages fast.
The main menu allows navigating to important pages in the website.
The blue mosque represents the actual mosque that is right next to the center and the little house represents the center itself, along side a shiny little sun and birds flying around to represent the peaceful environment that the center provides.
Next-up is a presentation video made by one of the volunteers.
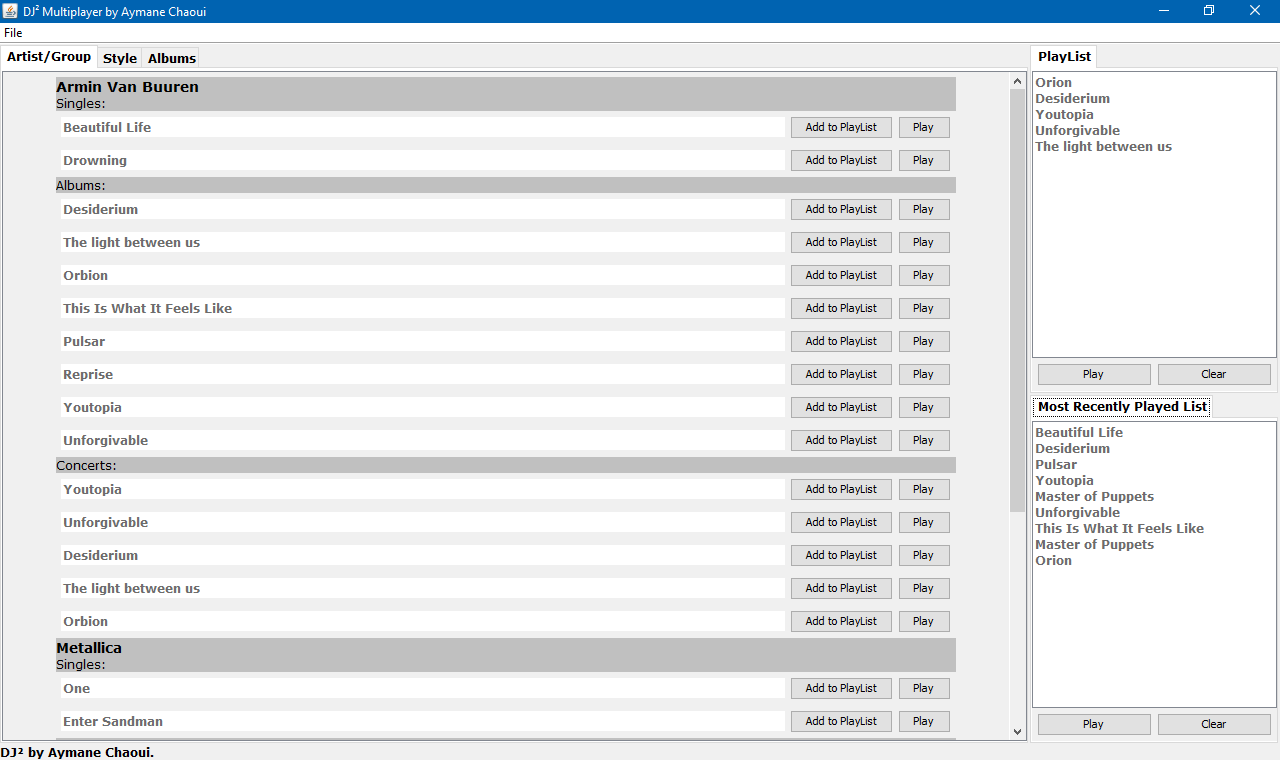
After that a list of the latest activities is shown. A visitor can sort the activities by category. Clicking on an activity takes the visitor to the activity details page.
Finally, the footer displays some quotes by educators, the center's contact information and a contact form.
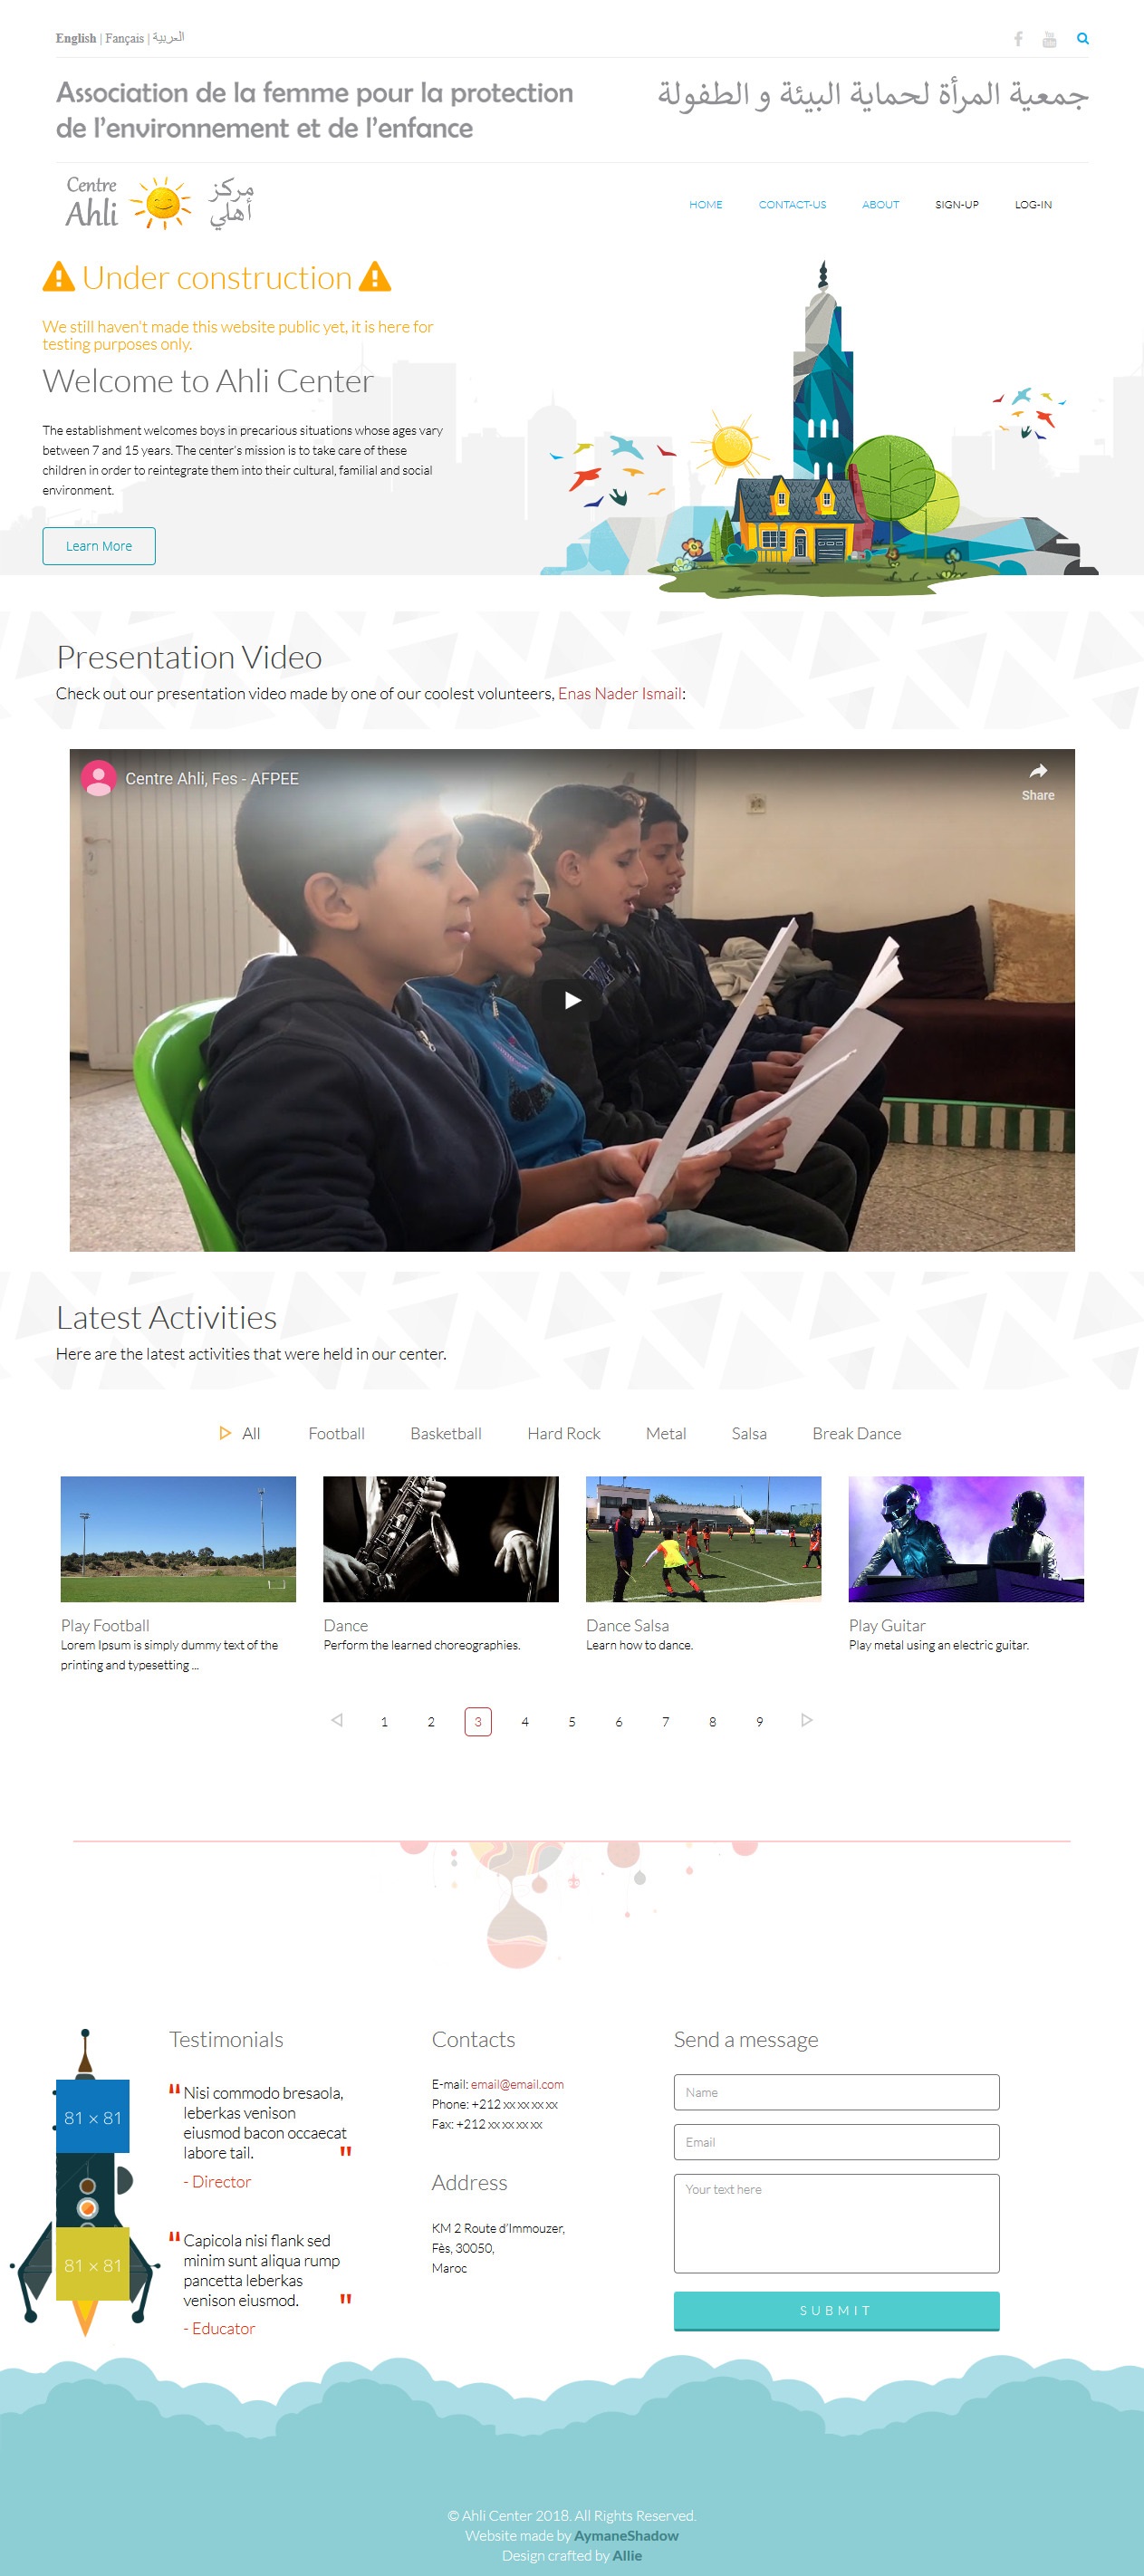
Picture 2: the front page.
Log-in
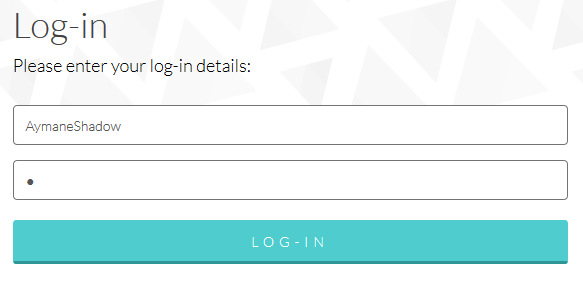
Picture 3: the log-in form.
In order to perform actions in the website such as making a comment, adding an activity as a volunteer, etc, one must create an account and log-in.
After loging-in
Profile
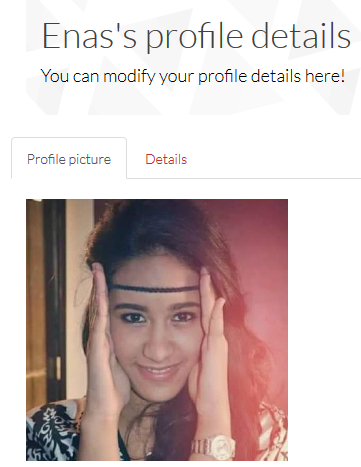
Picture 4: profile details.

Picture 5: more profile details.
Picture 4: profile details.
Picture 5: more profile details.
The profile page provides useful information about a user:
- Profile Picture
- Details such as a biography
- Notifications
- Upcoming Activities
- Created Activities
- Attended Activities
Actions
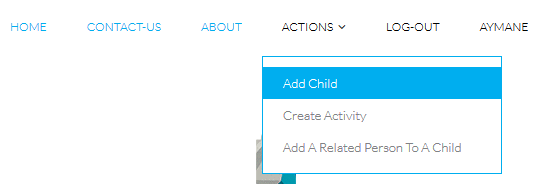
Picture 6: the actions field and the user's name are added to the menu.
Depending on the type of account that has loged-in, the user will see a slightly different interface. The picture above shows the actions available for the educators. If the account is of type volunteer then only "Create Activity" will be available.
Add Child
If an educator clicks on the "Add Child" action menu they'll have access to a form that allows adding a child's information to the database.
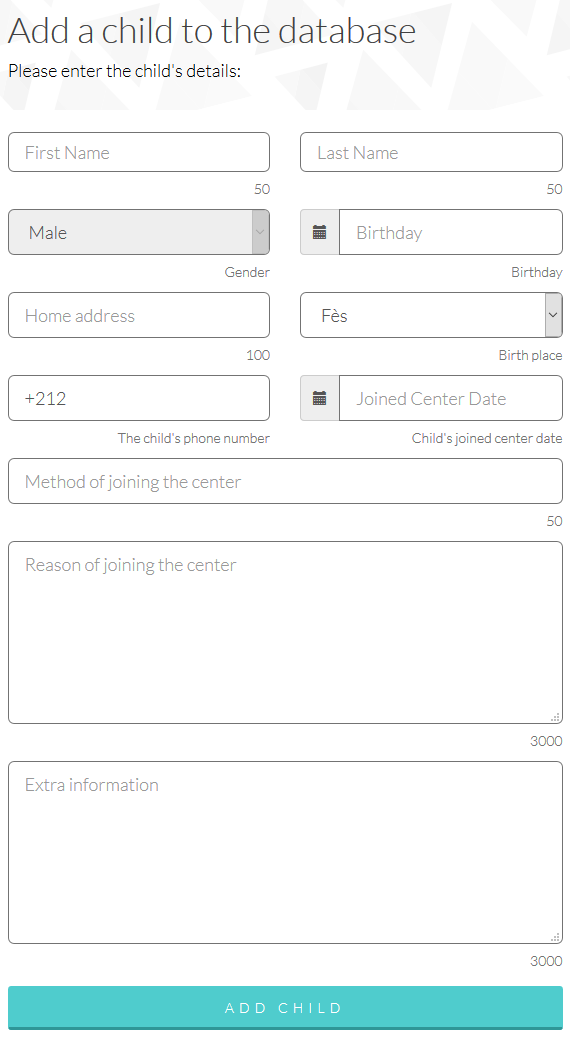
Picture 7: the form that allows adding a child to our database.
Add Related Person to a Child
To add a relative such as a parent or sibling the educator can click on the "Add A Related Person To A Child" button. After that they'll need to pick a child, then fill in the form.
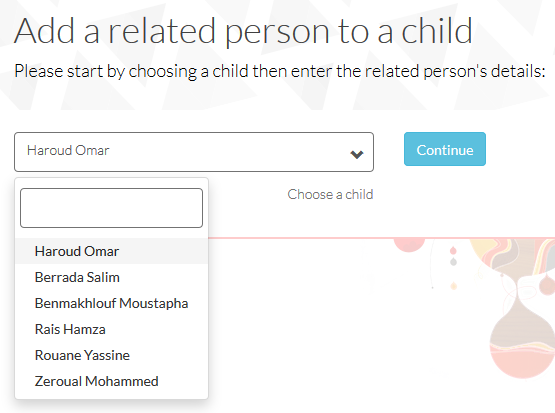
Picture 8: the form that allows looking for a specific child.
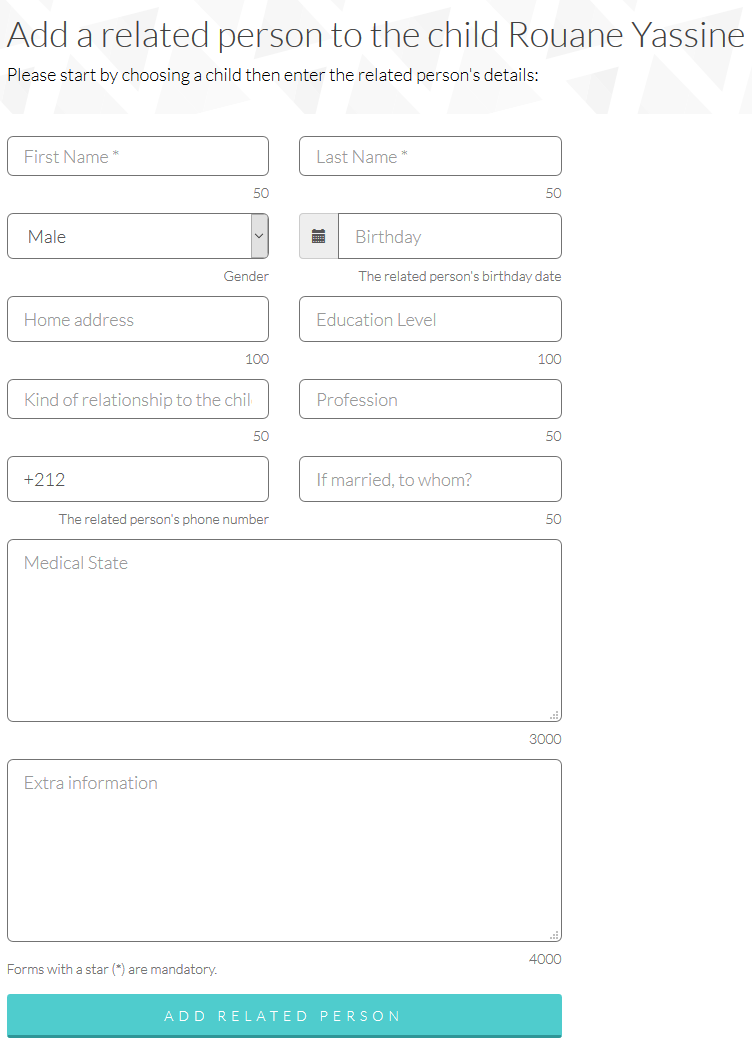
Picture 9: the form that allows looking for a specific child.
Create Activity
Both educators and volunteers can create an activity. After clicking on the "Create Activity" button in the action menu, users are invited to fill-in the activity details and add to it the children that will participate.
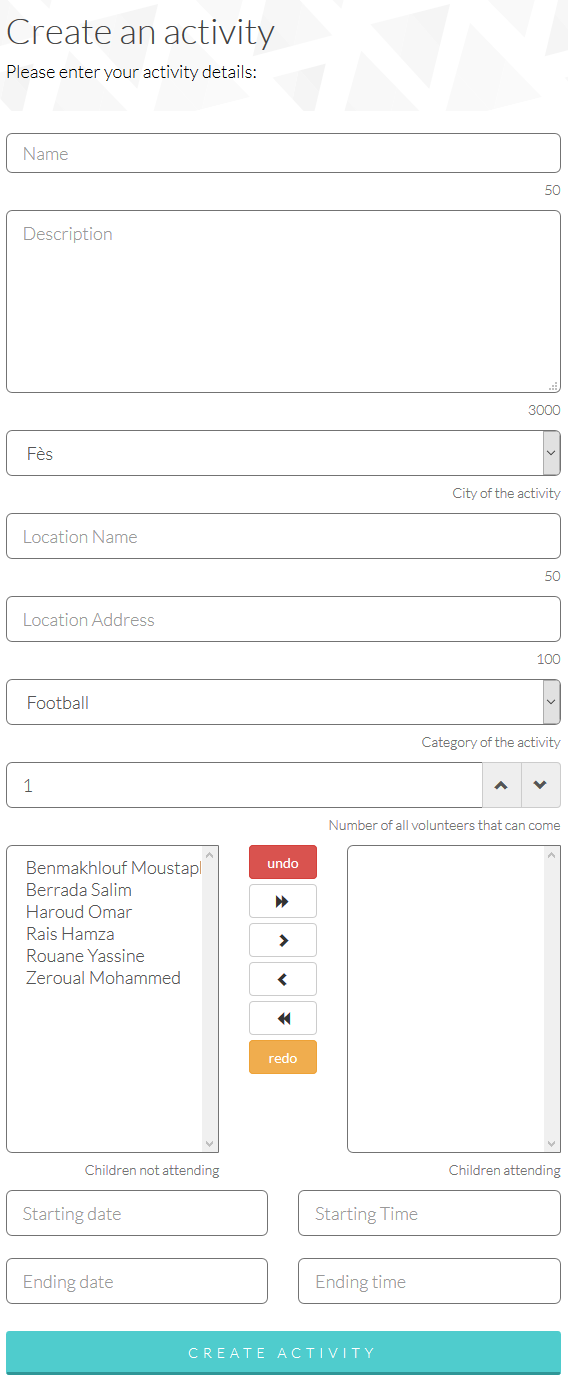
Picture 10: the form that allows creating an activity.
Activities
Activity page
An activity page is where all of its information is displayed:
- Description
- Location
- Date
- Participating Volunteers
- Volunteers Attendance
- Participating Children
- Children Attendance
- Comments
A page is also interactive in the sense that volunteers can add it to their upcoming activities, comment on it and have conversations with other volunteers in the comment section, and can be modified or deleted by the activity creator.
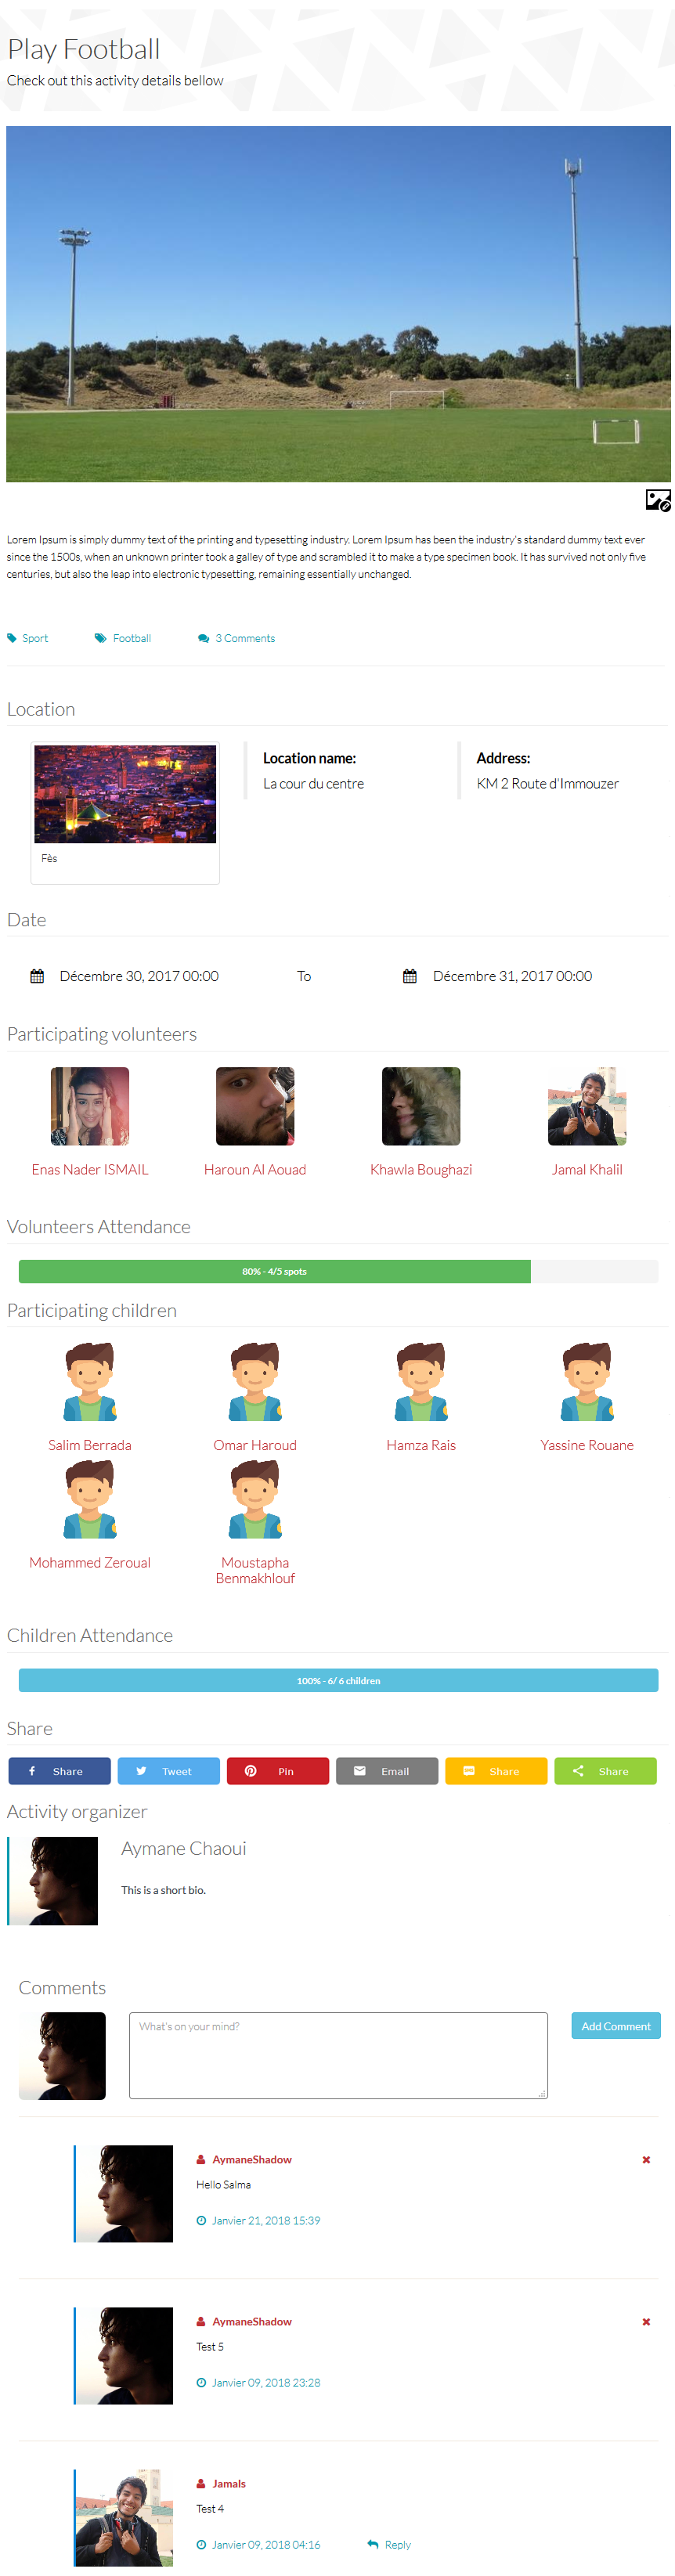
Picture 11: an activity page.
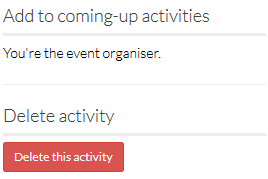
Picture 12: delete activity button (if the user is the owner).